Tie one

How to tie a Chinese knot: the good luck knot, step by step

The Chinese knot to learn first is the good luck knot, the lucky Chinese knot that is named for luck itself. Fold a cord into three loops and two hanging ends, fold each loop over the next and tuck the last one under the first, pull it tight, then do the same four folds the other way round. Four small loops appear at the corners; pull them out and you have the knot. It takes about a meter of cord and, on a first try, around twenty minutes.

The diagrams below are drawn with the cord in two colors so you can follow each half through the folds. The same nine steps are on a free printable sheet if you would rather have paper beside your board than a phone.

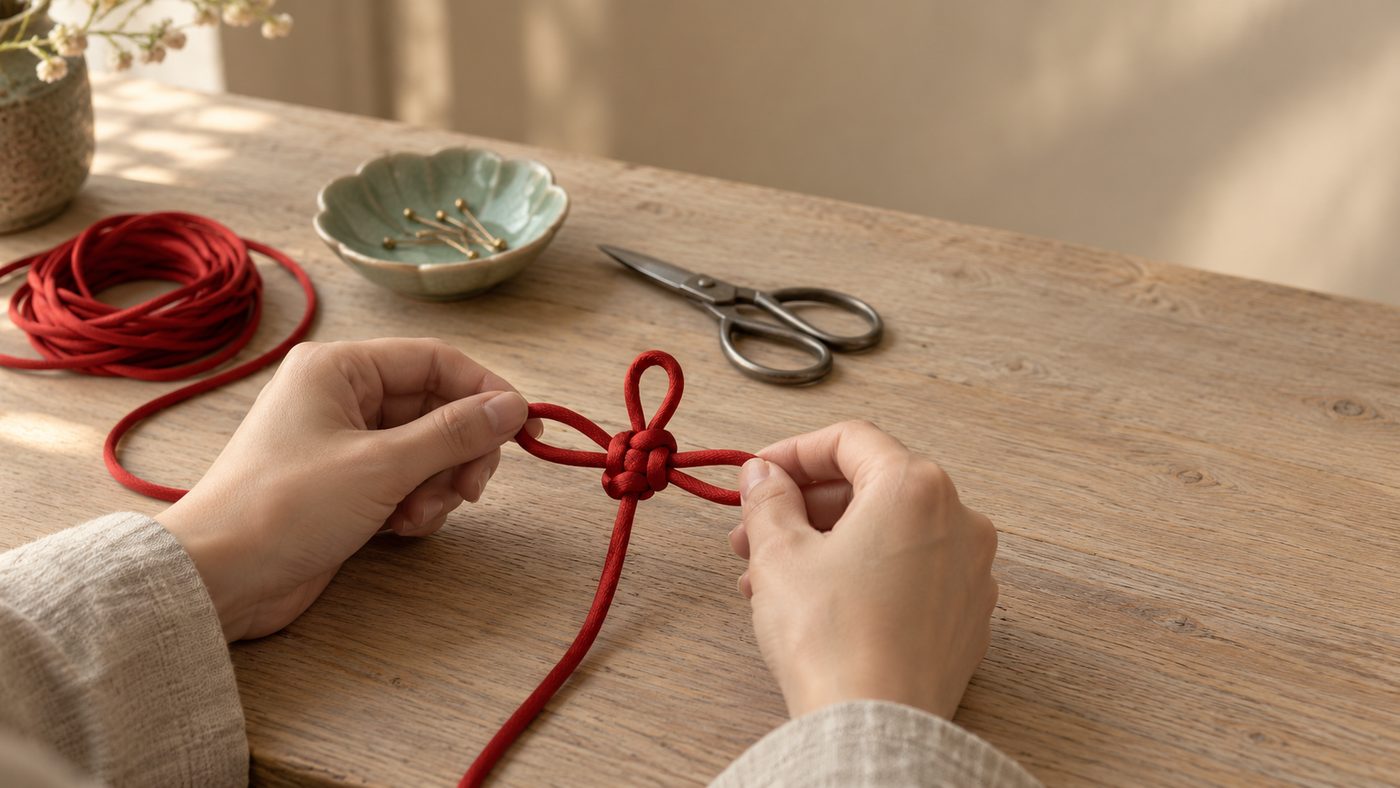
Two hands tightening a half-tied red lucky Chinese knot, the good luck knot, on a pale wooden table, with a coil of spare cord, scissors and a dish of pins beside it.
Tightening is where a knot is made or lost: a little on each loop, in turn. Illustration.

Why the lucky Chinese knot comes first

It is the knot the modern craft began with. In 1971 Chen Hsia-sheng, whose 1981 book later gave the craft the name "Chinese knot", was sent by her father-in-law, the deputy director of the National Palace Museum in Taipei, to learn knotting from an old museum craftsman, Wang Zhenkai. He knew two knots. One was the button knot, the other the auspicious knot, ji xiang jie, which is the good luck knot on this page, according to her own account to Taipei’s Commercial Times in 2023. Nearly half a century of her research grew out of those two knots, which makes them a fair place for anyone else to begin.

It is also the friendliest knot to learn on. It lies flat, so you can pin it down and see every crossing; it is made of one move repeated, a loop folded over its neighbor; and it forgives a beginner, because a loose crossing can be pulled snug at the end. The name is the whole of its meaning, since ji xiang is the everyday word for good luck. The other knots and the wishes they are named for are on our page on the Chinese knot and its meaning.

One curiosity for the knot-minded. Clifford Ashley’s 1944 Ashley Book of Knots, the sailor’s bible of knots, catalogs this one only by description, as a seven-looped knot, number 1106. Carol Wang, who runs the most careful knotting reference online, notes that it was reportedly a nameless orphan until Chen, writing in English as Lydia Chen, called it the Good Luck Knot. Japan calls it the chrysanthemum knot and Korea the one-mind knot. China named it for luck.
What you need

Materials for tying a Chinese good luck knot: the cord, its length, a board, pins and something to finish the ends.
You need What works Why
Cord Satin cord of nylon or polyester, sold as "rattail" or Chinese knotting cord 2 to 3 mm thick for a first knot: firm enough to hold a fold, smooth enough to slide when you tighten
Length About 1 m (40 in) Gives loops of 5 to 7 cm (2 to 3 in) and ends to spare. Cut more rather than less; the tails trim off
Board A cork board, a foam sheet or a folded towel Anything you can push pins into; it keeps the loops where you laid them
Pins Five or six straight pins One for the middle of the cord, one for each loop
Finishing Sharp scissors; a lighter for synthetic cord, or clear glue for silk or cotton To trim the ends and stop them fraying

A word on silk. It is the traditional material, it takes color beautifully, and it is miserable to learn on: it slides out of every fold before you can pin it. Learn the moves in satin cord, then tie your good one in silk. If all you have is a shoelace, that works too for a practice run; it is just harder to tighten evenly.

How to tie it, step by step

The knot is two rounds of the same four folds. In the first round each loop folds to its left, round the cross counterclockwise; in the second, each folds to its right. Pin the middle of the cord and the tip of each loop as you go, and keep every loop flat rather than twisted.

  1. 1Lay out three loops and the ends

    Fold the cord in half and pin the middle to your board. Make three loops of the same length, one up, one left, one right, and let the two ends hang down. Pin each loop at its tip. In the diagrams the two halves of the cord are drawn red and black so you can follow them; your knot will be one color.

  2. 2Fold the top loop down

    Round one. Fold the top loop down so it lies over the left loop. The arrow shows the fold.

  3. 3Fold the left loop to the right

    Fold the left loop across to the right, over the top loop you just folded and over the two ends.

  4. 4Fold the ends up

    Fold the two ends up together, over the left loop and over the right loop. Keep them side by side rather than crossed.

  5. 5Fold the right loop left and tuck it

    Fold the right loop to the left, over the ends, and slide it UNDER the folded part of the top loop, through the gap the top loop made when you folded it. This is the step that holds everything: each loop now traps the next one round.

  6. 6Tighten the first round

    Unpin, then pull the three loops and the ends outward, a little each in turn, until a small woven square forms in the middle. The ends now point up and the left and right loops have swapped sides. That is correct.

  7. 7Round two, the other way

    Now fold in the opposite direction. Fold the ends (now on top) down over the right loop. Then fold the right loop to the left, over the ends and over the bottom loop.

  8. 8Finish round two and tighten

    Fold the bottom loop up over the right and left loops. Fold the left loop to the right, over the bottom loop, and tuck it UNDER the folded ends. Pull everything snug again, evenly, the same way as before.

  9. 9Pull out the corner loops and dress the knot

    Four small loops now sit at the corners of the square. Ease each one out to the size you like, then even up the three big loops by working the slack through the knot. Hang it with the ends down.

Download the printable step sheet (PDF): all nine diagrams on one page, free, no signup. More free sheets, from paper-cutting templates to character practice pages, are on our printables page.

Tightening and finishing

Tightening is the real skill, and the only part a diagram cannot show. Pull each loop and the pair of ends outward a little at a time, going round in order, never yanking one arm on its own. If one side of the square looks loose, find the crossing with the slack and walk it along the cord toward the nearest loop. Carol Wang’s advice for the button knot holds here too: when a small loop disappears into the body of the knot, fish it out with tweezers or a crochet hook instead of pulling harder.

Then dress it. Ease the four corner loops out until they are the size you like; the traditional look has them small and round, like the petals of a flower around the three big loops. Do not shrink them to nothing: Carol Wang warns that side loops pulled too small can let the whole knot fall apart. Even up the three big loops by feeding slack from one to the next through the knot.

Finally, the ends. Trim them to the length you want. Synthetic cord can be sealed with a quick pass of a lighter flame, just enough to melt the tip; silk and cotton get a dab of clear glue instead. Leave the ends long and you can thread beads on them, tie them into a loop for a key ring, or bind them into a tassel, which is how the big New Year knots are finished.

Common mistakes

  • Forgetting the tuck. The fourth fold of each round must go under the first. Lay it on top instead and the round falls open the moment you unpin it.
  • Doing round two the same way as round one. Two rounds in the same direction twist into a spiral column instead of a flat knot, and the corner loops never appear. Round two goes the other way round.
  • Uneven loops at the start. A long loop stays long. Measure the three loops against each other before the first fold; it saves half the dressing time.
  • Twisted loops. If a loop turns over on itself while you fold, the two strands cross where they should lie side by side and the woven square comes out lumpy. Flatten each loop as you lay it.
  • Pulling one arm hard. It closes that side and locks the slack into the others. Tighten in turns.
  • Losing track after round one. The ends point up after the first round. That is right; the second round brings them back down.

Next: the button knot

The other knot Wang Zhenkai taught is the button knot, the little round ball that fastens a qipao or a Chinese jacket, and it is the natural second knot. It starts flat, as a double coin knot, the woven figure that sailors know as the carrick bend; then each end goes round the outside and up through the diamond in the middle from underneath, and the knot is worked tight until it closes into a sphere. The Ashley Book of Knots gives it as numbers 599 and 600. Sewn to a garment opposite a loop of the same cord, it becomes the button on a qipao collar, and our page on Chinese knot buttons follows it from Song dynasty jackets to the pipa and butterfly shapes tailors coil today.

We have not drawn it here, on purpose. Its last step happens underneath and then in three dimensions, and a flat line drawing is misleading at exactly the moment it matters. Carol Wang’s button knot pages photograph it in your hands, several ways, and are the best free guide we know.

Questions people ask

What is the easiest Chinese knot to tie for beginners? +

The good luck knot. It is made of the same move done eight times: fold one loop over the next, and tuck the last under the first. It lies flat, so you can pin it to a board and see every crossing, and two rounds give you a finished knot with three big loops and four small ones. The button knot is just as traditional but harder, because it closes into a ball. These two were the first knots Chen Hsia-sheng, who named the craft "Chinese knot", learned in 1971.

How do you tie a Chinese good luck knot? +

Fold a cord in half, pin the middle, and lay out three equal loops (top, left, right) with the ends hanging down. Fold the top loop down over the left, the left over the top and the ends, the ends up over the left and right loops, and the right loop over the ends and under the folded top loop. Pull it tight evenly. Repeat the same four folds in the opposite direction, tighten again, and pull out the four small loops at the corners.

What cord is used for Chinese knots? +

Satin cord, usually nylon or polyester, often sold as rattail cord. Silk is the traditional material and looks the best, but it is slippery and hard to tighten evenly on a first try. For learning, 2 to 3 mm satin cord is ideal: thick enough to see the crossings, firm enough to keep a fold. Avoid stretchy elastic, flat ribbon, which twists, and thick paracord, which makes a chunky, stiff knot.

How much cord do you need for a Chinese knot? +

For a good luck knot in 2 to 3 mm cord with loops of 5 to 7 cm, about 1 m (40 in) is plenty, with ends to spare. Each extra centimeter of loop costs two centimeters of cord, so for larger loops add twice the extra length you want on each of the three loops. It is always better to start long: the tails can be trimmed, but a short cord cannot be lengthened.

What does the Chinese good luck knot mean? +

Its name is the meaning. In Chinese it is ji xiang jie, the "auspicious knot", and ji xiang is the ordinary word for good luck, the one an almanac uses for a good day. Chinese knots are named after the wish they carry; our page on the Chinese knot goes through the others, from the endless knot for things that last to the same-heart knot for a marriage. In Japan the same knot is called the chrysanthemum knot, and in Korea the one-mind knot.

How do you tie a Chinese button knot? +

Fold the cord in half to make a loop at the top, then lay the two ends into a double coin knot (a flat, woven knot that sailors call the carrick bend) below the loop. Bring each end around the outside of the knot and up through the diamond-shaped hole in the middle from underneath, so both ends come out together. Then work the slack out slowly, pushing the edges down, until it closes into a round ball. It is harder than the good luck knot because that last step happens in three dimensions.

Is there a printable Chinese knot tutorial? +

Yes. Our free one-page PDF has all nine good luck knot steps with the same diagrams as this page, the cord and length, and room to work beside it. Print it on A4 or US Letter, pin your cord to a board beside it, and follow the numbers. There is no signup.

How do you keep a Chinese knot from coming undone? +

Tighten it evenly, a little at a time, so every crossing is snug; a knot pulled hard on one side stays loose on the others. Do not shrink the small corner loops too far, or the structure loses its grip. Then fix the ends: melt synthetic cord with a quick pass of a lighter, or dab silk and cotton with clear glue. For something that gets handled, like a keychain, a dot of glue inside the knot keeps the loops from creeping.

Sources and further reading

Keep going

Stay in the loop.

Chinese mythology, the zodiac, and the meaning behind names and symbols, rooted in the classics and read back to you. No spam. Unsubscribe anytime.